Close the Panel, Then Look: The 12V-2x6 Clearance Check That Beats Any Zip Tie
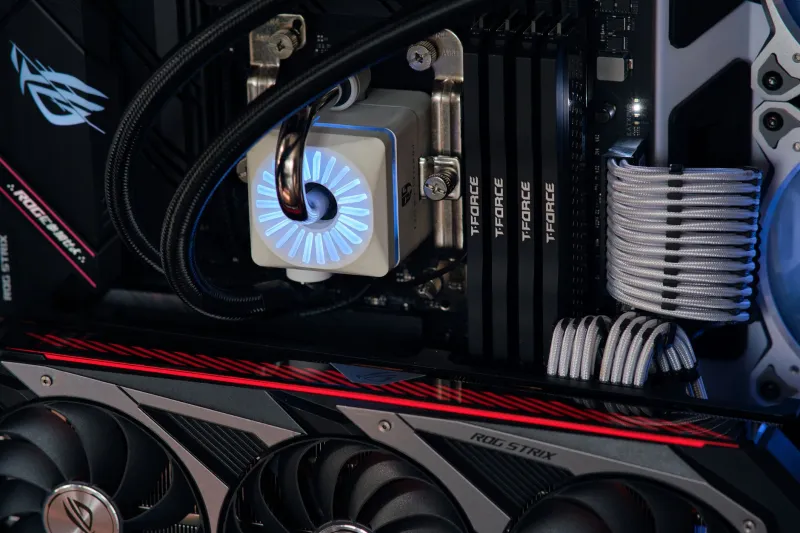
There's a moment in every GPU upgrade where the build looks finished. Card in, cable clicked home, panel back on, machine booted. Everything's fine. Then three weeks later the thing shuts down mid-game, or you catch a whiff of hot plastic through the vent, and you start googling '12V-2x6 melting' at eleven at night.
Nine times out of ten the connector wasn't the culprit. The routing was. Specifically, a glass side panel quietly levering the cable through a 90-degree turn about ten millimetres from the plug, which is exactly the sort of thing that never shows up in a build log photo.
This is a short, practical routine for checking that before it becomes a repair bill.
The bend radius is a clearance problem, not a tidiness problem
PCI-SIG's guidance for the 12V-2x6 (and the older 12VHPWR) connector asks for roughly 35mm of straight cable before any bend — call it an inch and a half in old money. That's measured from the back of the plug housing, not from the edge of the card, and not from where the cable disappears behind the motherboard tray.
Why so fussy? Because at 600W you're pushing about 50 amps through twelve pins, and each individual terminal only has a small contact area to work with. Bend the cable hard right at the plug and you start applying lateral load to the housing. The terminals tilt very slightly inside their slots, contact pressure drops, resistance climbs, heat builds. The connector doesn't fail dramatically — it cooks slowly, and the first symptom is usually a shutdown or a black screen under load.
The 12V-2x6 revision improved things by shortening the four sense pins, so a partially seated plug won't be allowed to pull full power. That's a useful safety net. It is not a licence to treat the cable like a shoelace.
What your case actually gives you
Case spec sheets list maximum CPU cooler height and maximum GPU length. Almost none of them list the number that matters here: the distance from the GPU's power socket to the inside face of the side panel.
So measure it yourself. With the card fitted, hold a steel rule vertically from the centre of the connector to the panel line and read it off. On a lot of mid-tower UK favourites — Fractal North, Lancool 216, Corsair 3500X, Phanteks XT Pro — you'll find somewhere between 35mm and 60mm, which is plenty if the cable leaves the plug and heads straight back. It gets tight when the cable has to do anything else: drop immediately, sweep sideways, or fight a PSU shroud that sits directly under the card.
Mesh side panels buy you another 5–10mm of give. Tempered glass buys you nothing, and it will crack from a point load if you force it.
Three routes that actually work
Native cable, routed down and around. The cleanest option if your PSU ships a proper 12V-2x6 lead. Take it straight back from the plug for the first 35mm, then sweep it down behind the card and out to the shroud opening. Velcro the cable to a chassis anchor point — never pull it sideways at the plug to make it tidy.
A native right-angle cable. Several 2026 PSU ranges now ship a 90-degree 12V-2x6 lead, and a few sell one as an accessory. If the panel gap is genuinely under 35mm, this is the correct fix, not an adapter.
A rigid angled adapter, as a last resort. Only if it states the wattage, only from a brand you'd recognise, and only the solid moulded type. The flexible fabric-wrapped ones are a lottery, and the four-into-one octopus adapters need more space behind the card than most people give them.
What you should not do is what most of us did the first time: zip-tie the cable to the GPU support bracket to pull it clear of the fans, then close the panel and hope.
The close-the-panel-then-inspect routine
- Plug in with the panel off. Push until you feel and hear the click, then photograph the joint with your phone flash on. Look at all four sides for a gap. A partially seated plug can look fine at a glance.
- Route it with a gentle sweep. Straight for 35mm, then curve. Anchor the cable to the case, not to itself.
- Fit the panel using two fingers of pressure. If it needs the heel of your hand, or if it sits proud on one corner, stop. Something is being compressed that shouldn't be.
- Take the panel straight back off and inspect. Cable still straight at the plug? Any whitening or stress marks on the insulation? Any visible sideways load on the housing?
- Refit and look into the gap with a torch, or slide a phone camera down between the card and the glass.
- Load test for 20–30 minutes. A Speed Way loop or a demanding game, with HWiNFO open watching the 12V rail. Feel the plug afterwards — carefully. Warm is normal; hot enough to snatch your hand back is not. An infrared thermometer takes the guesswork out for about £15.
- Recheck after a week. Thermal cycling settles cables into their final position, and what looked clear on day one sometimes isn't by day eight.
UK-specific traps worth knowing
Vertical GPU mounts add a riser cable — another connector, another bend, and often less room than the horizontal layout. Back-connect cases hide the cables beautifully but can put the 12V-2x6 socket in an awkward spot relative to the rear chamber. And the small-form-factor builds that are so tempting for a spare-room office rarely leave 35mm, which is why native right-angle leads exist in the first place.
One more: never mix a modular cable from one PSU with another brand's unit. That particular mistake has been destroying builds since long before any of this and it hasn't stopped being popular.
Spend £30, not £700
If your case can't give the cable room, the answer is a native right-angle lead, a different case, or a card with a lower power draw. Any of those costs less than the aftermath of a scorched connector — and considerably less than the card it's attached to. The side panel test takes ten minutes. Do it before the build goes into service, not after the first unexplained shutdown.